There’s chocolate and then there’s chocolate that transports you. Imagine the moment you take a bite and everything slows down. You’re not just tasting something sweet; you’re experiencing something rare, layered with tradition and indulgence. That’s exactly what makes this Dubai chocolate recipe so unforgettable.
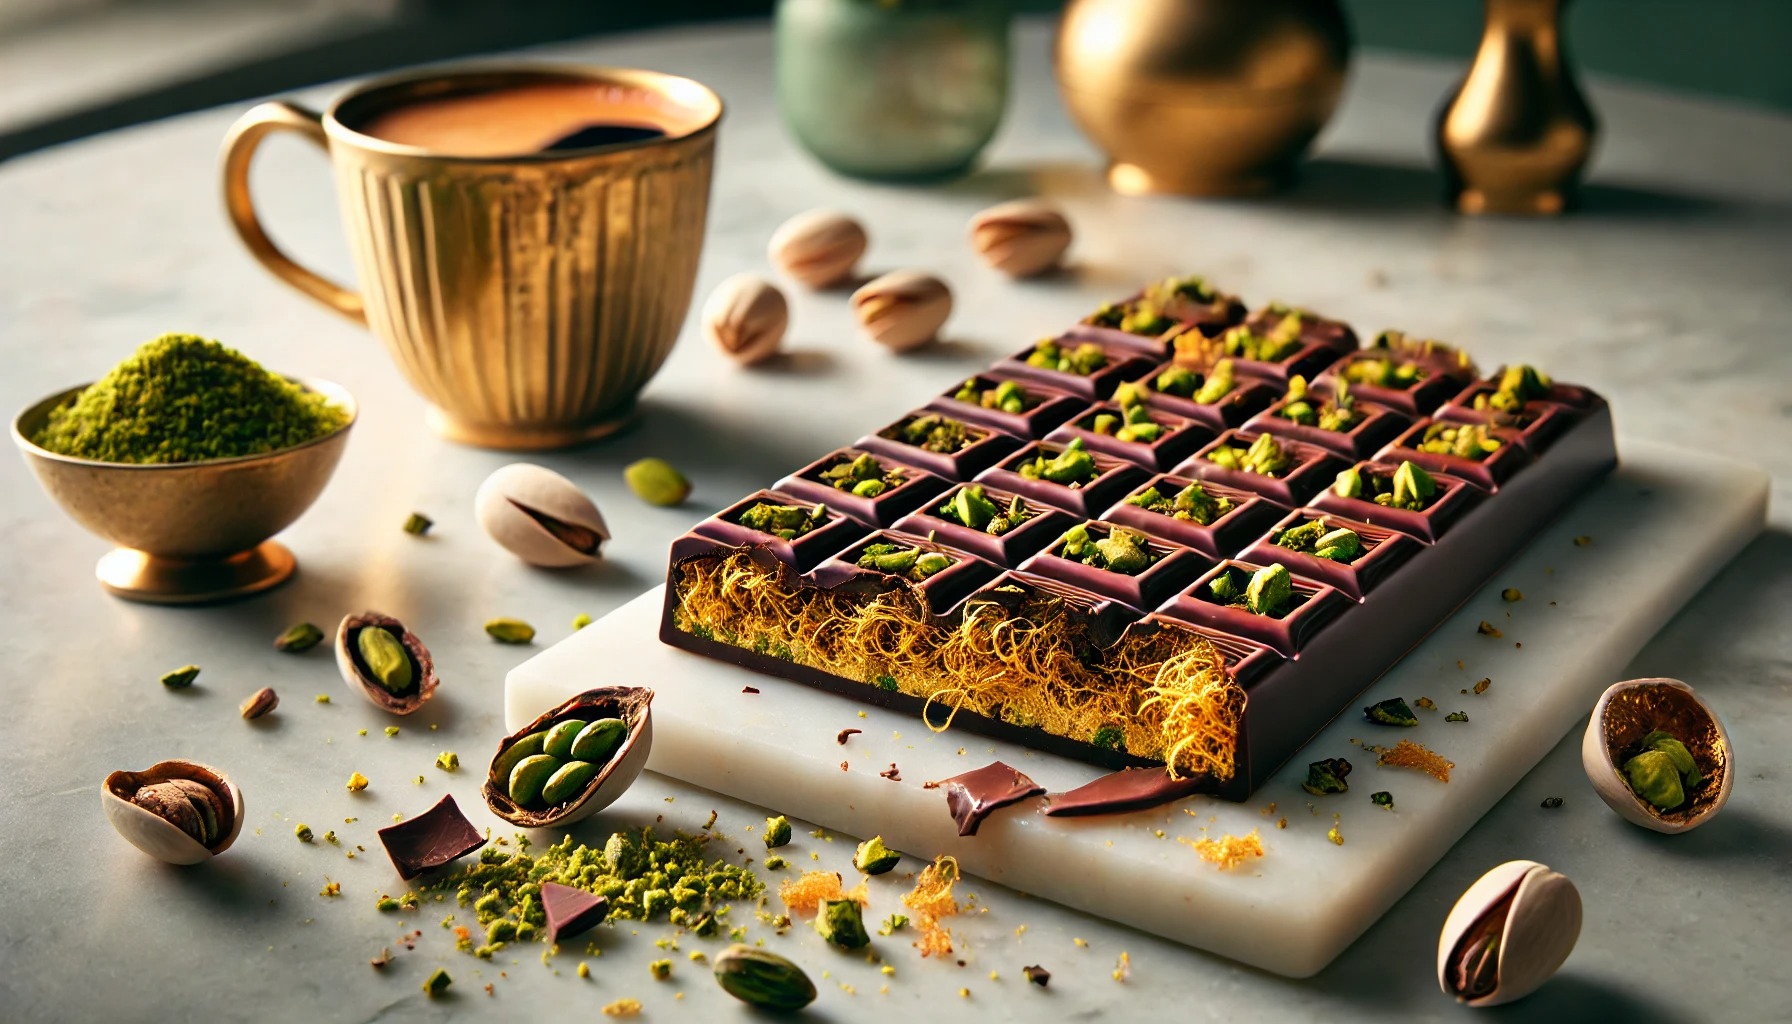
If you’ve ever wandered through the spice markets or patisseries of Dubai, you know that the flavors there are nothing short of magical. Think rich chocolate layered with crunchy pistachios, buttery kunafa threads, and a delicate kiss of rose water.
This isn’t your average dessert. This is a sensory journey, one you can now recreate at home.
What Is Dubai Chocolate?
Dubai chocolate isn’t a single recipe. It’s a culinary concept that blends chocolate’s global appeal with Middle Eastern opulence. At its heart, it’s a fusion: velvety chocolate, traditional ingredients like pistachios and kunafa (a crisp shredded phyllo dough), and sometimes a whisper of cardamom or rose.
This isn’t something you grab in a wrapper at a gas station. This is handcrafted, layered, elegant. A reflection of the luxurious hospitality and creativity that defines Dubai’s food culture.
The Story Behind the Flavor
Dubai is a place where gold is stirred into cappuccinos, dates are stuffed with nuts and dipped in chocolate, and every sweet bite carries the weight of centuries-old traditions. The ingredients in this chocolate recipe were chosen not just for taste but for cultural significance.
- Pistachios: Symbolic of hospitality and celebration across the Middle East.
- Kunafa: Traditionally used in desserts like kanafeh, this crisp shredded dough adds a delicate crunch that elevates the bar.
- Rose water: Common in Persian and Arab sweets, it adds a fragrant, romantic note.
Together with high-quality chocolate, these elements create something rich but balanced, traditional but inventive.
Also read: The Best Rick Nolan Hotdish Recipe You’ll Ever Make
Ingredients That Make It Work
Every bite of this chocolate bar tells a story. Here’s what you’ll need to create your own luxurious Dubai-inspired treat:
Dubai Chocolate Recipe
Equipment
- Medium baking dish (lined with parchment)
- Double boiler or heat-safe bowl
- Pastry brush
- Sharp knife
- Food processor (optional)
Ingredients
- 200 g premium dark or milk chocolate 70% cacao recommended for deeper flavor
- 250 g kunafa dough kataifi pastry – available at Middle Eastern or specialty grocery stores
- 1 cup shelled unsalted pistachios, roughly chopped
- 2 tablespoons rose water or orange blossom water for variation
- ½ cup melted unsalted butter
- Pinch of sea salt
- Optional: Edible gold dust cardamom powder, or crushed dried rose petals for garnish
Instructions
- Prepare the Kunafa Layer
- Preheat your oven to 350°F (175°C).
- Lightly grease your baking dish.
- Place the kunafa dough in a bowl, gently pull it apart with your fingers, and mix it with the melted butter.
- Press a thin, even layer into the bottom of the dish.
- Bake for 10–15 minutes, or until golden and crispy. Let cool completely.
- Melt the Chocolate
- Use a double boiler to gently melt the chocolate.
- Stir in the rose water and a pinch of sea salt once melted for depth of flavor.
- Assemble the Layers
- Pour the melted chocolate over the cooled kunafa base, spreading evenly.
- Sprinkle generously with chopped pistachios.
- Optional: Add a dusting of edible gold or dried rose petals for that luxury finish.
- Chill and Slice
- Place in the refrigerator for at least 1 hour to set.
- Once firm, slice into bars or squares.
Notes
Nutrition
Pro Tips from the Kitchen
- Use good chocolate: The flavor of your final product depends on it.
- Avoid over-baking: Kunafa should be golden and crisp, not brown and dry.
- Cool completely before layering with chocolate, or it may seize.
- Want extra crunch? Toast your pistachios before sprinkling.
Make It Your Own: Custom Variations
This recipe is a blank canvas. Try these tweaks:
- Add cardamom or saffron to the chocolate for more complexity.
- Switch the nuts: Almonds, walnuts, or hazelnuts all bring unique textures.
- Add a fruit layer: A swipe of date paste between kunafa and chocolate adds depth.
What to Pair It With
A rich dessert deserves the right company. Here’s how to round out the experience:
- Arabic Coffee – Lightly spiced with cardamom, it balances the sweetness.
- Mint Tea – Refreshing and perfect for afternoon servings.
- Ginger-Lemon Water – A palate cleanser that contrasts the richness beautifully.
Storing Your Dubai Chocolate Bars
Want to save a few bars for later (if they last that long)? Here’s how:
- At Room Temp: Store in a sealed container for up to 2 days.
- Refrigerated: Keeps for 1 week. Bring to room temp before serving.
- Frozen: Wrap in parchment and freeze for up to a month. Thaw in fridge overnight.
Can This Be Health-Conscious?
Believe it or not—yes.
- Dark chocolate is rich in antioxidants.
- Pistachios offer healthy fats and fiber.
- Kunafa in moderation provides crunch without needing processed crusts.
- Use less sugar overall compared to most desserts.
For a lighter take:
- Use 85% cacao chocolate
- Reduce butter
- Swap some kunafa with crushed puffed rice or nuts
Final Thoughts: More Than Dessert
This isn’t just chocolate. This is Dubai in edible form—luxury, heritage, and modernity in every bite. Whether you’re entertaining guests or treating yourself on a quiet evening, this homemade chocolate bar is a showstopper.
More importantly, it connects you to a culture that treats food as more than sustenance—it’s celebration, tradition, and hospitality all rolled into one.
So go ahead, unwrap your own piece of the Middle East. Your taste buds (and your guests) will thank you.
Frequently Asked Questions
Yes, but go easy on rose water—it can overpower the milder flavor.
Phyllo pastry cut into thin strips is a decent substitute.
Only if you use certified gluten-free kunafa or phyllo dough.
Up to 7 days refrigerated or 1 month frozen.
Use gold foil or custom wrappers, then place in a tin or velvet box. Elegant and unforgettable.